Invite a teammate
draft · 3 image slots
By the end of this a new teammate has an account in your workspace, the right access level, and the job roles that say what they do. It's one page and about two minutes. Both kinds of role get set here, which is why Job role vs. org role is worth reading first if you haven't.
You need the Owner or Admin org role. Members don't see this page.
1. Send the invite
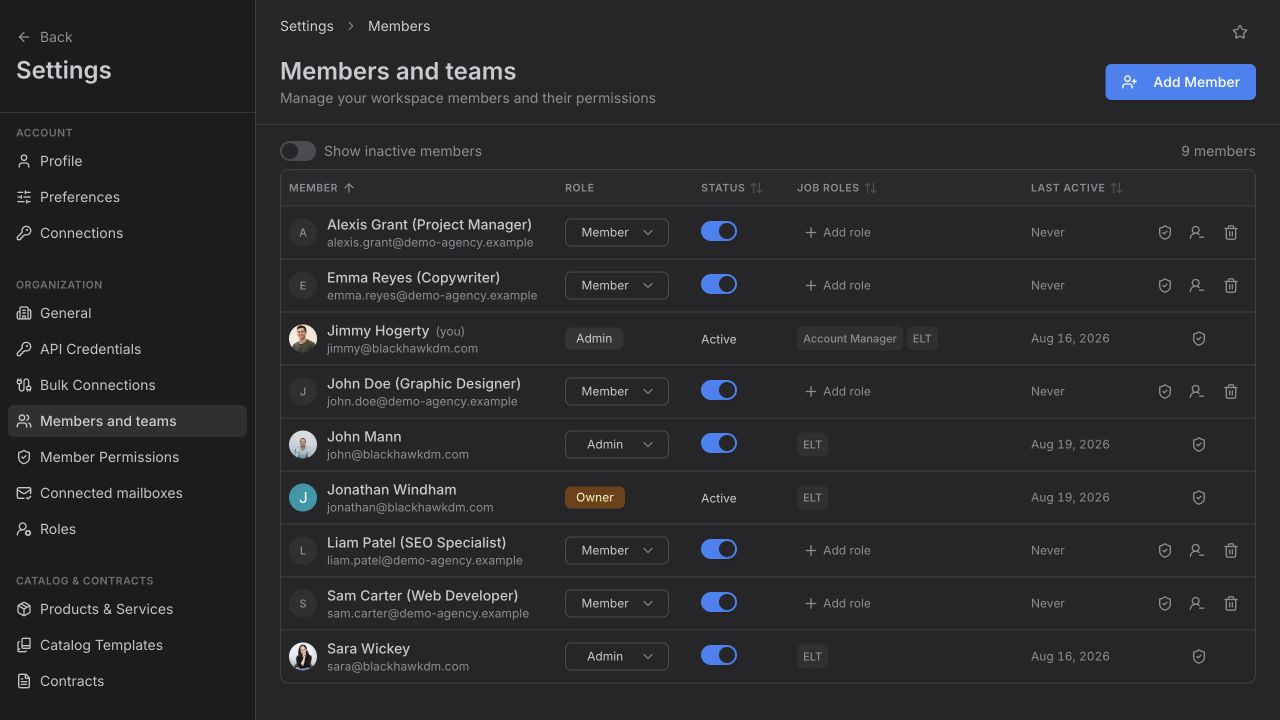
Go to Settings → Members and teams and click Add Member.
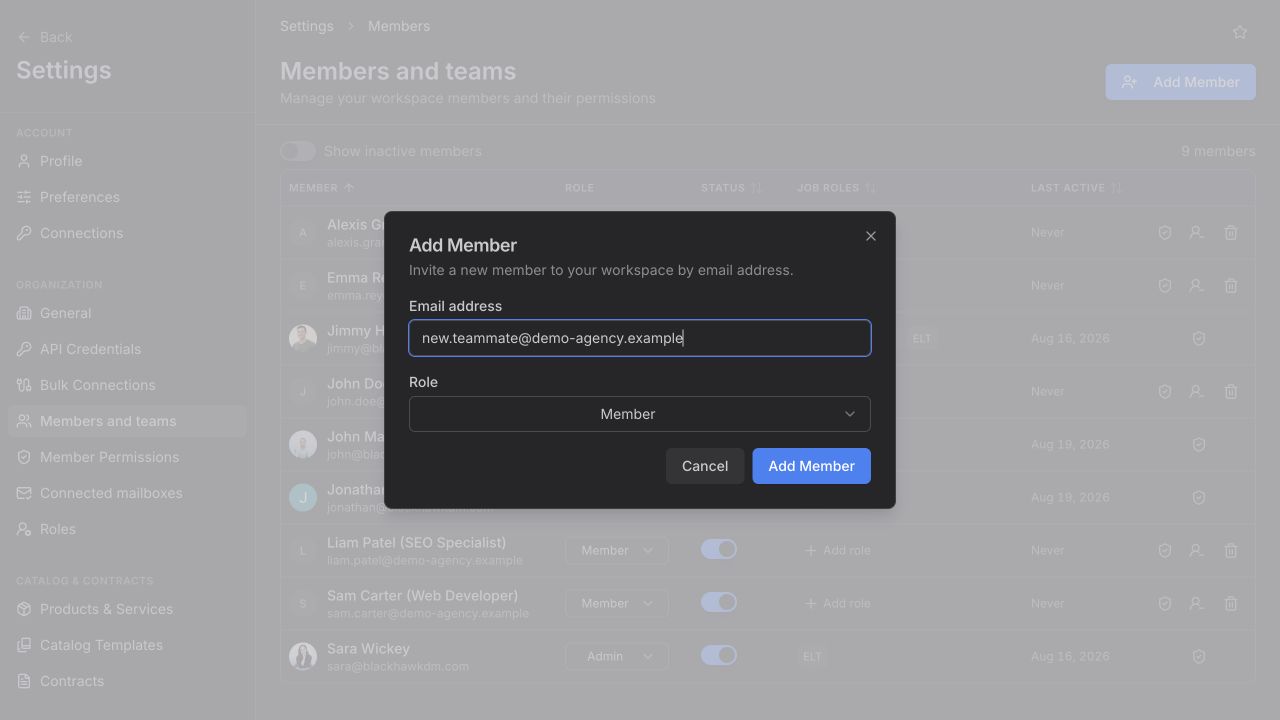
Fill in two fields:
- Email address — the address they'll sign in with.
- Role — their org role. Member is the default and the right answer for most people; see What each org role can do. If you're an Admin rather than an Owner, Owner isn't in this list.
Click Add Member. What happens next depends on whether they already have a Feta account:
- They already have one — they're added straight away, and the dialog confirms it: has been added as Member.
- They don't — Feta creates an invitation and emails them, subject line You're invited to join your workspace. The dialog confirms Invitation sent. Invitations are good for seven days; if one lapses, send a new one from the same button.
Two things it will refuse, both with a message in the dialog:
- This person is already a member of the workspace — check the members list, and turn on Show inactive members in case they're suspended rather than missing.
- A pending invitation already exists for this email — one is already out; wait for them to accept it.
2. Give them their job roles
Job roles are set from the members table itself, not from the invite dialog — so do this immediately after, while you're still on the page.
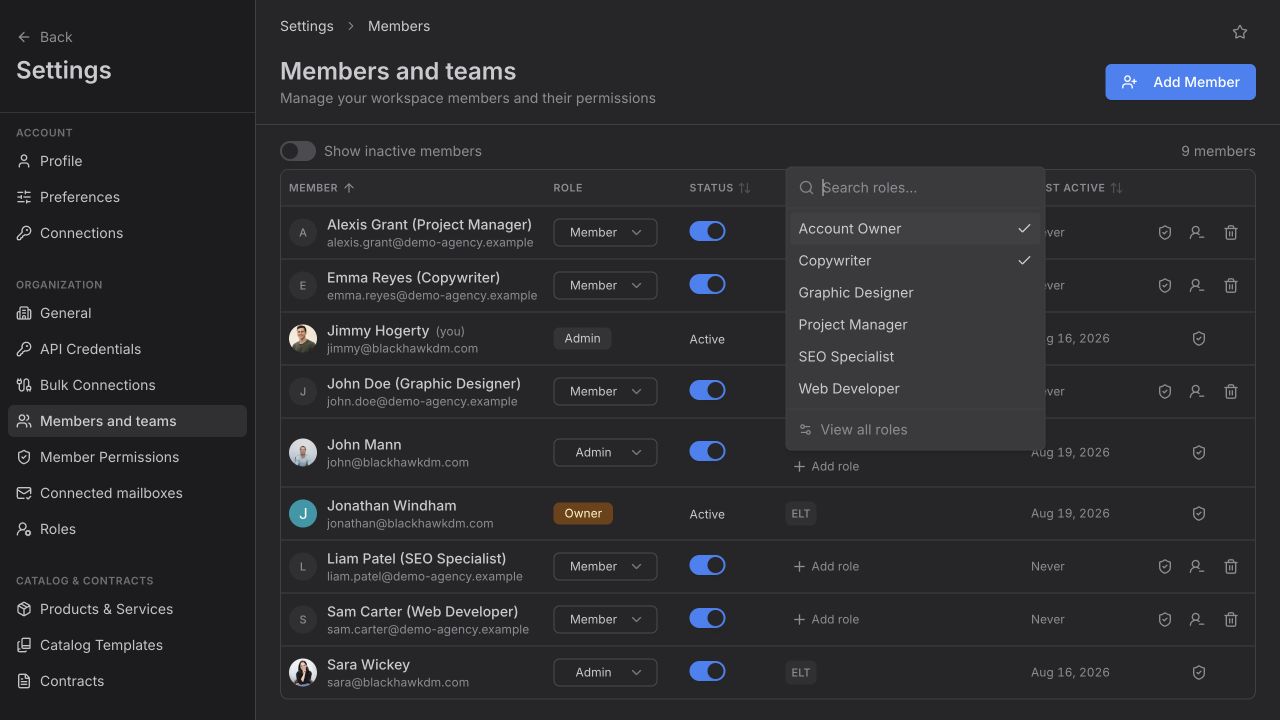
Find their row and look at the Job Roles column. There's an Add role button there — if they already have roles listed, hover the row to bring it out. Click it, search if your list is long, and click each role they hold. A tick marks the ones they have; clicking a ticked role takes it off again. Add as many as fit — most people hold one or two, some hold four.
To remove a role later, hover its badge in that column and click the remove control.
If the role you want isn't in the list, the popover's View all roles link takes you to Settings → Roles, where you can create it: Set up team roles.
You can set job roles on someone before they've accepted, and on anyone already in the list. It's never a one-time window.
3. Point them at their first client
Job roles on a person say what they do. They don't yet say for whom. To put this person's name against a specific account, open that client and use its Team tab — Assign client role owners.
Changing your mind later
Everything here is editable from the same table. Role is a dropdown on each row — change it and it saves. The Status switch deactivates and reactivates. Job roles are the column you just used. Nobody has to be re-invited to be changed.
Where to go next
- What each org role can do — including who can change whom.
- Assign client role owners — the payoff for setting job roles.
- Turn on task notifications — worth sending to every new teammate on day one.
Open questions — draft only
- The invite API accepts job role ids alongside the org role and applies both in one call, but the Add Member dialog has no job role picker — the shipped flow is invite first, then set job roles from the Job Roles column on the same page. This article documents the dialog as it exists.
- Invitations are created with a seven-day expiry. Nothing in the Add Member dialog or the members table shows that expiry to the reader, so the article states it as a fact rather than pointing at a countdown on screen.