Quick start guide
draft · 4 image slots
This is the whole product in one pass. Pick a real client — one you can connect a Google Analytics account for — and by the end you'll have their record, their team, their work, and their performance data all in one place. Budget about twenty minutes.
If you'd rather read the map before walking it, start with How Feta is organized.
1. Set up the workspace
The first time you sign in, Feta walks you through setup. Only two steps are required — naming your workspace and reviewing your roles — and you can skip the rest and come back later.
The steps are:
| Step | What it does | Required |
|---|---|---|
| Agency workspace | Names the workspace your team shares | Yes |
| Brand & previews | Your logo and colors, and how client-facing output will look | No |
| Payments | Connects Stripe (ask us if you don't see this) | No |
| Agency roles | Reviews the recommended role set for your team | Yes |
| Invite team | Adds coworkers with their access and job responsibilities | No |
| First client | Adds one client | No |
| Connect platforms | Analytics, Search Console, Business Profile | No |
| Meeting recordings | Sends Fathom meetings into your workspace | No |
| Ready to go | Review and enter the workspace | Yes |
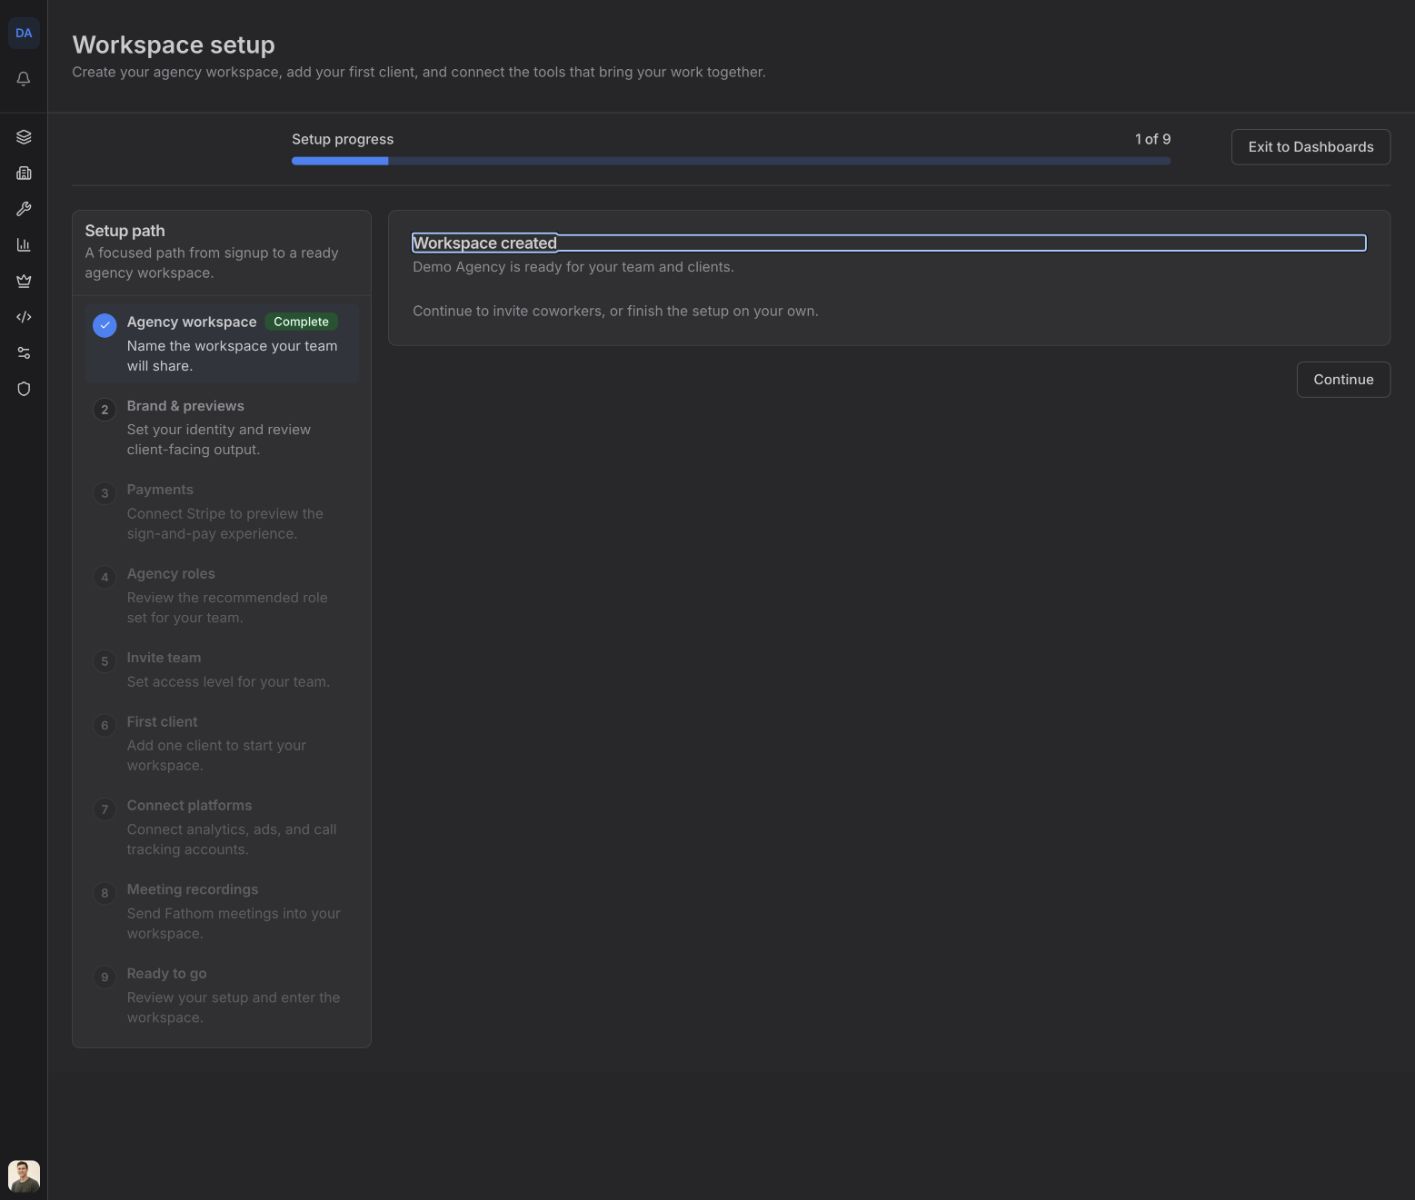
Skipping a step costs nothing. Everything in it has a home in the app you can reach later, and this guide covers the ones that matter.
2. Add the client
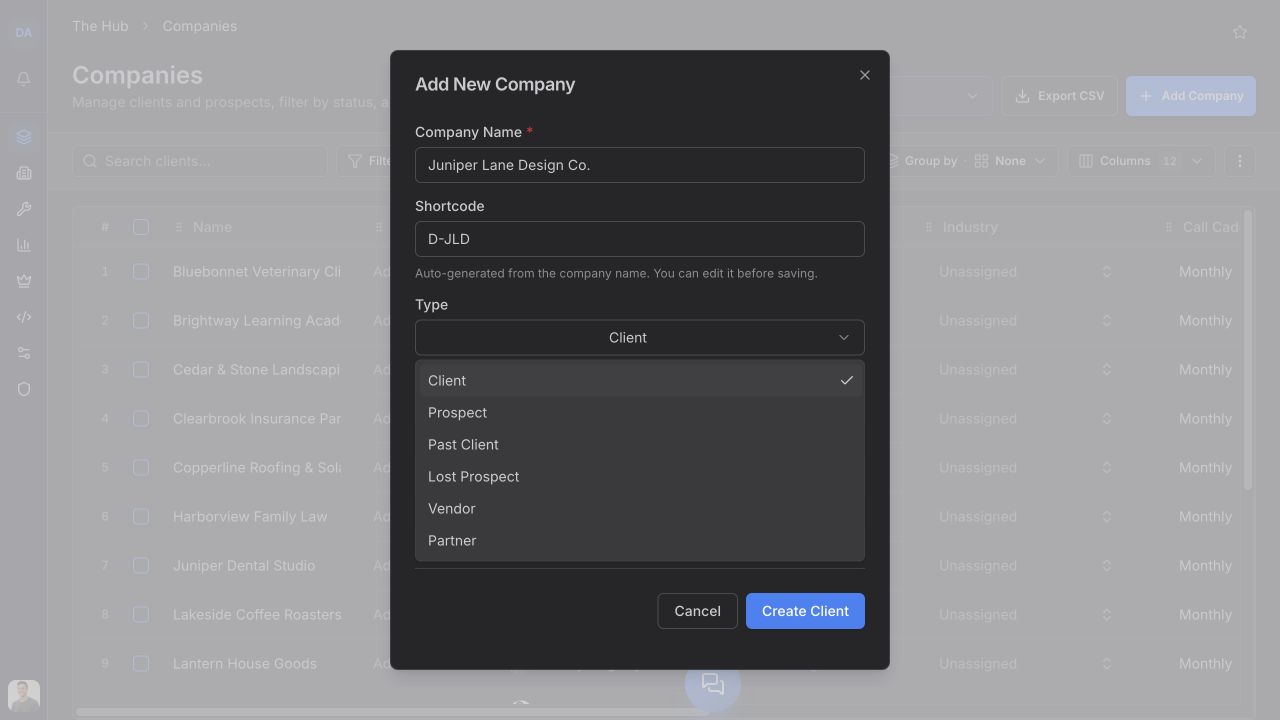
Go to Companies → Add client. You need a name; everything else can wait.
Set the lifecycle to match reality — prospect if you're still selling, client if the work is live. It's the same record either way, so when a prospect signs you change one field instead of starting over.
3. Add the people
Open the company and go to its People tab. Add the contacts you actually deal with — the person who signs, the person who answers questions. Each one is attached to this company, so they'll appear anywhere its work shows up.
Your own teammates are added a different way, under Settings → Members and teams. See Invite a teammate.
4. Say who owns the work
Still on the company, assign your team to it — who's the account manager, who runs SEO. These are job roles, and they're what makes "show me everything I'm responsible for" work later.
Assign client role owners covers this in full.
5. Put the work in
Two ways in, depending on what you're doing.
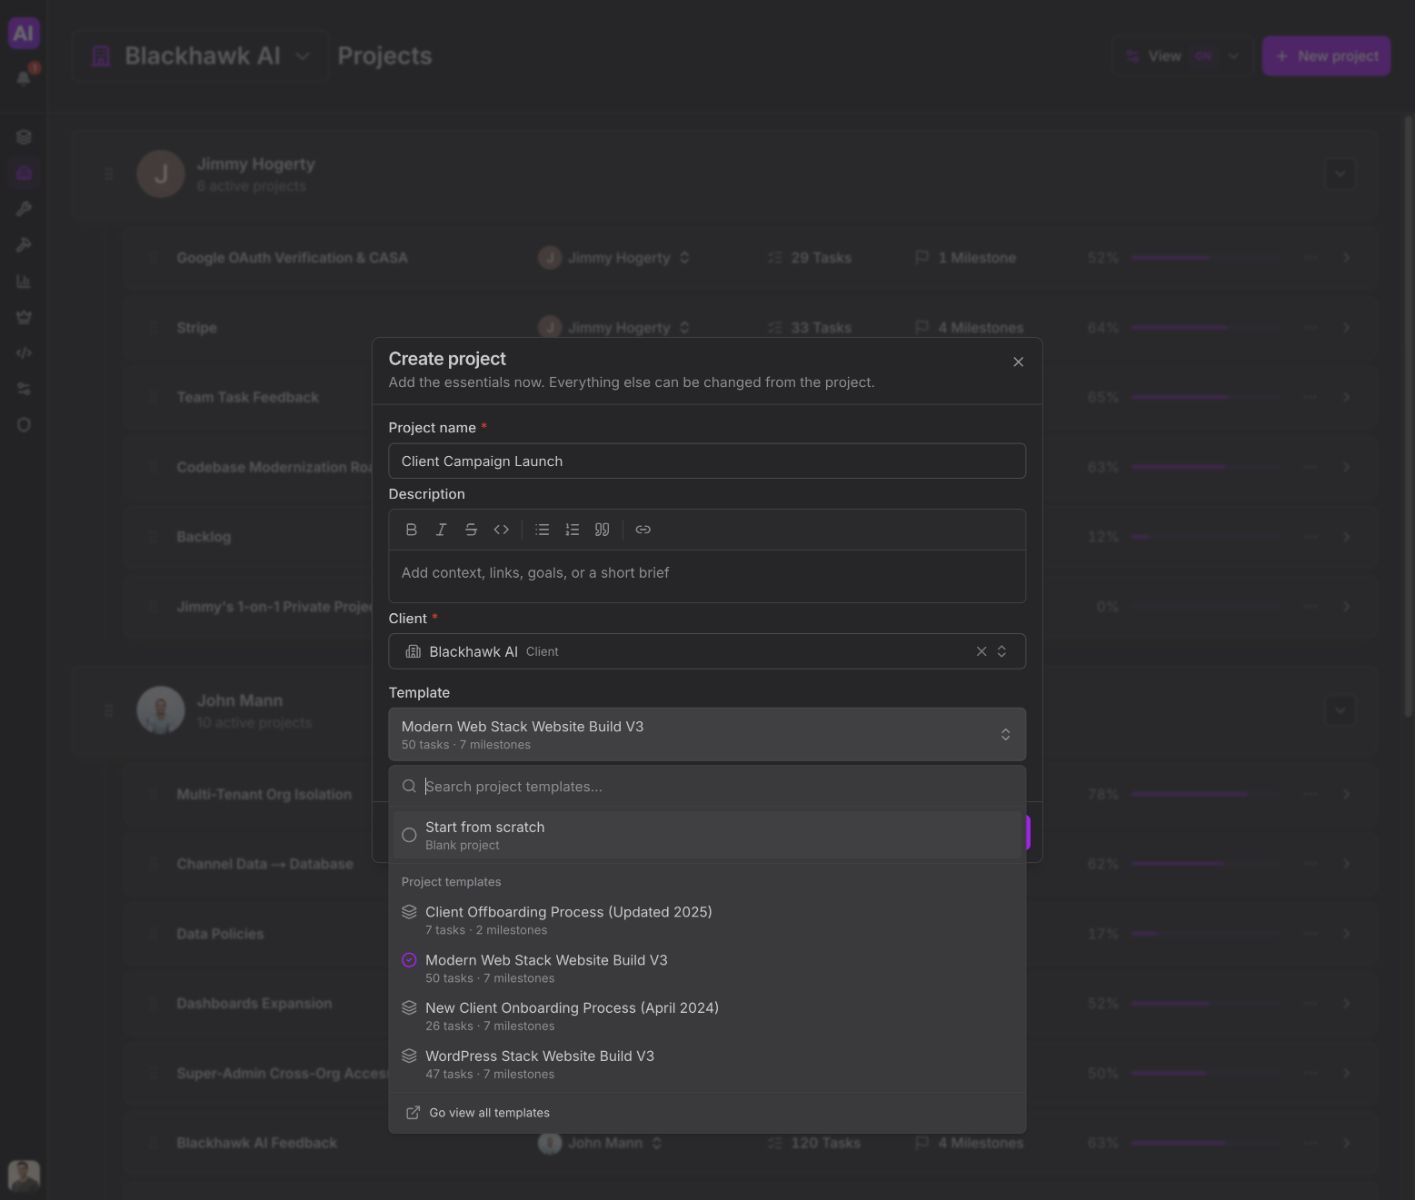
A project, for work with a shape — a website build, a campaign launch. Go to Projects → New project, pick the client, and if a template fits, start from it. The template brings its whole task plan with it, dated and assigned.
Loose tasks, for everything else. Go to Tasks → New task and set the client. A task doesn't need a project.
Either way the work is attached to the client from the start, which is what makes every later view — by client, by person, by due date — just work.
6. Connect their data
Go to Settings → API credentials and connect Google. Feta will show you the Analytics properties and Search Console sites your Google account can reach; pick the ones belonging to this client.
Give it a few minutes. The first sync backfills history, so the dashboards won't be empty when you look.
Full detail: Connect Google Analytics 4 and Connect Search Console.
7. Look at the result
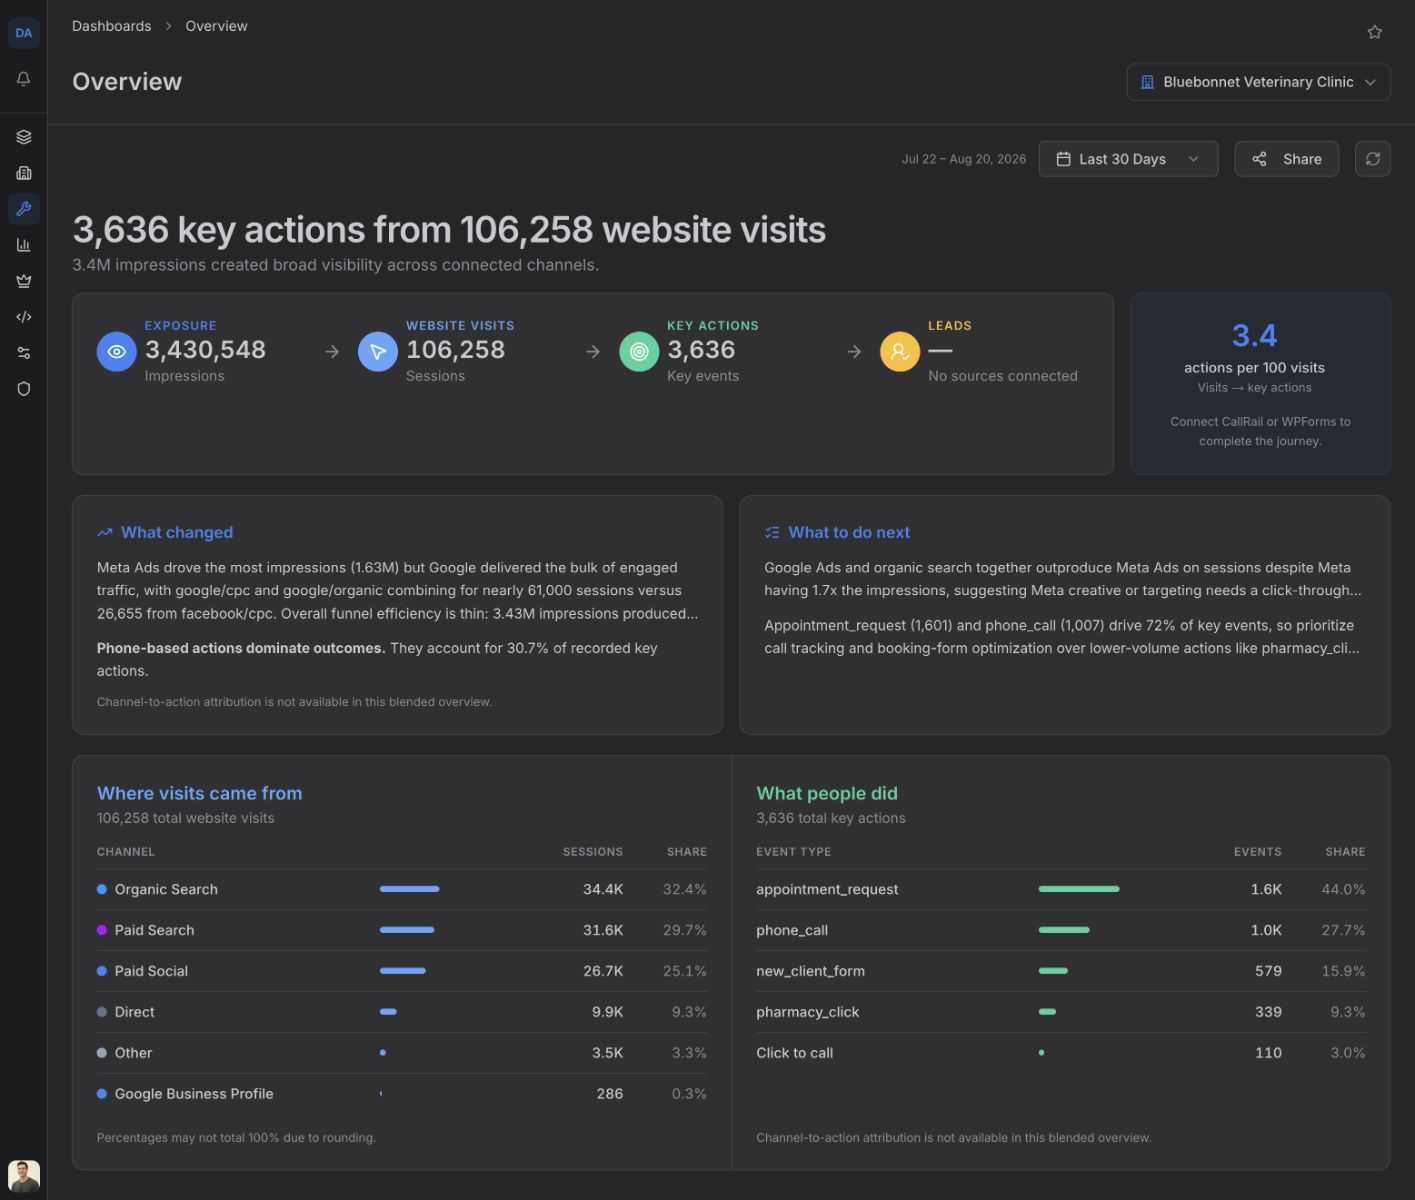
Open the client and go to Dashboards → Overview. You should see their traffic, search performance, and lead activity in one view — no report to assemble, no spreadsheet to update.
If it's empty, it's almost always the connection rather than the dashboard: Fix a dashboard with no data.
What you just built
One company, its people, who owns it, the work in flight, and live performance data — the whole spine of the product, for one client. Every other article is a detail inside one of those steps.
Do it once more for a second client and you'll stop needing the guide.
Where to go next
- Selling something? Set up your price book, then Create and send a contract.
- Growing the team? Job role vs. org role.
- Doing this every month? Queue a task on completion is the first automation worth setting up.